Whether you are looking for a way to enjoy your iPhone music on your new Mac or simply back up your music on mac, you are not alone. As many people have been stuck with this question for a long time, that’s why we proffer two simple solutions here. From now on, your desire to transfer music from iPhone to Mac has now been simplified.

How to Transfer Music from iPhone to Mac for Free using iTunes
As the default iPhone music management app, iTunes can be a workable option to sync purchased music to Mac. However, the music transferred are limited to iTunes purchased songs. Below are some steps for how to transfer music from iPhone to Mac using iTunes.
Step 1. Turn off iTunes Auto Sync
Open your iTunes and choose “Preferences – Devices”. In the new window, Check the box in front of “Prevent iPods, iPhones, and iPads from syncing automatically”.
Step 2. Use Apple ID for Mac Authorization
Go to “Store” menu in iTunes and click “Authorize This Computer…”. In the popped-up window, type your Apple ID which is used to purchase songs on your iPhone.
Step 3. Transfer Your Purchased Music to iTunes
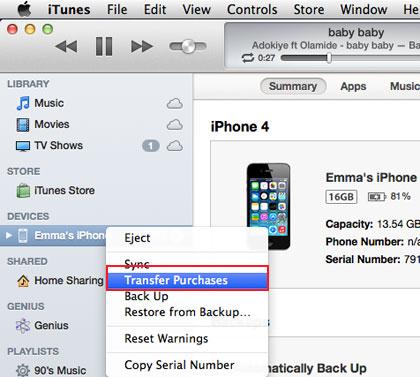
Connect your iPhone to the Mac and click “View – Show Sidebar”. In the left devices field, you will see your iPhone and right-click it to choose “Transfer Purchases” in the list.
How to Convert Music on Mac with All2MP3 for Mac
Not all of the music on your iPhone is purchased from iTunes. You might get them through ripping an audio CD, downloading from websites or your friends’ sending and so on. These music may be saved in different formats but you just want to convert them to MP3, a universal audio format for convenient playback, storing and sharing. Here is a way to fix this problem. Using All2MP3 for Mac to convert your iPhone music to MP3 on Mac only needs a touch of button. The below workflow shows how it works and if you get interests, download and use it for free!
First, Upload Your Audio Files to All2MP3 for Mac
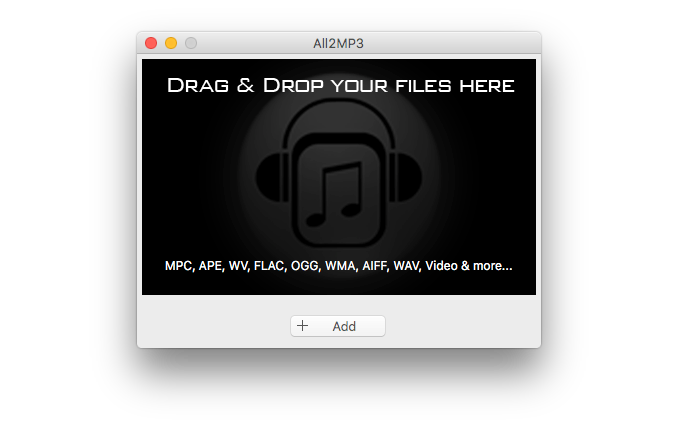
After the successful download and launching of All2MP3 for Mac, just open it by double-clicking. As it shows, you can input files by a simple drag & drop or a click of the button of “Add”.
Second, Adjust Output Settings
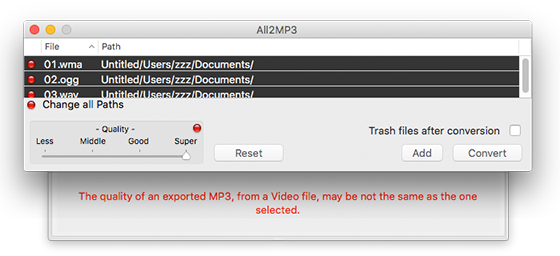
You can choose quality level and bitrate in the field of “Quality”. There is a round button at the right corner and red is for quality and green is for bitrate. Just click on it to change between the two options. You can drag the slider on the slider bar below to choose the wanted quality and bitrate. If there is something wrong, you still get a chance to restore the settings with “Reset”. Click on the red button of “Change all Paths” and choose a folder to save the converted files. If needed, you are also allowed to add more files to convert and delete source files automatically after conversion.
Third, Start Your Conversion
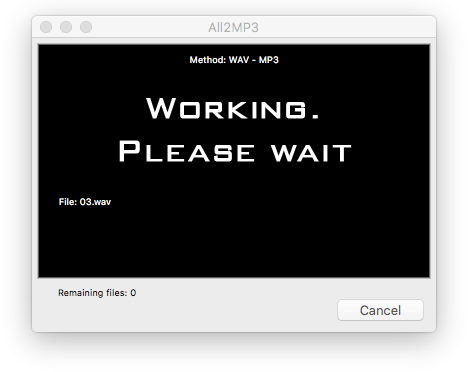
Make sure that all the settings are ok, just click “Convert” to get started. The conversion process usually takes a few seconds, after that, you can easily find the converted files with the name of “xxx.mp3” (xxx is the original file name) in the output folder.
Conclusion
As we know, iOS is a closed system proposed by Apples different from Android system. This blocks iPhone users from transferring music from iPhone to Mac. In this case, you would better rely on the above two methods, which can solve the problem effectively. After reading this article, you will surely enjoy your music both on your iPhone and Mac without limitations.